Wednesday, January 8, 2014

Christmas Pins Roundup

What pins did you try out for Christmas this year? Here are the ones that I either made or ate for the Holidays:

Easter egg ornaments - My kids loved these.
Kettlecorn - Note that some popcorn poppers allow for only 1/2 cup of kernels.
Oreo truffles - My sister made these and they were amazing.
Applecrisp - Super easy!
Peppermint bark - You can get candy canes without red dye 40 from Whole Foods.
Double Chocolatey Hot Cocoa in a Jar - This makes a lot of hot cocoa!
Cowgirl Cookies in a Jar - Substitute chocolate chips for the candies if you want to avoid food dyes.
Trailblazer bean soup in a jar - Gifts in a jar are easy to make.
Glitter Tea Towels - The tulip glimmer transfer sheets are really easy to cut and use!
Wrapping paper bows - Just as easy as it looks.
Sweet Potato Pie - Vegan!


Things I want to try next year:

Friday, December 20, 2013

Easter Egg Ornaments

Who else has toddlers who won't leave the Christmas tree alone? Even my four year old occasionally brings me an ornament to ask me about it or to request permission to fly it like a space ship. And then leaves it in the two year old's reach. ARG.

Some years we set up a separate little tree for them, which they love, but which I totally forgot to do this year. I forgot in part because I was busy obsessing over these babies:

Pin it!
The 2yo was so excited that he wouldn't hold still.


The kids went nutso over them, too. They flew them around like spaceships. They ran through the house with them. And only one out of six started to fall apart!

I got the inspiration from a Martha Stewart craft where they wanted you to use actual craft materials to make nice looking owl treat boxes. Since I wanted them for my little kids to destroy, I used:

1. Easter eggs
2. Felt
3. Googly eyes
4. Ribbon for hanging
5. Low temp hot glue gun/glue

Here is how I put them together:
1) I sketched out the pieces I wanted on plain paper, cut them out, and held them up to one of the eggs as a prototype. 

2) Then, I selected eggs that still had both halfs attached and still opened and closed easily, because the kids were going to be coming to me any time that they had trouble opening and closing them.

3) I lay out several different colors of felt and traced my paper cut outs with white fabric pencil all in one go.

4) I cut all the pieces out, making small piles that went together for each egg.

5) Then it was time to warm up the low temp hot glue gun! The seam where the eggs are held together I designated the back and, in the case of the angels, glued the wings there first. For the owls I began by gluing the face on the "front" top. Careful not to glue anything to the seam or across the seam, so that the eggs will still open.

6) Cut ribbon and glue on the top back.

TADA!

Have fun!

Monday, May 13, 2013

Raspberry Turnovers


Source: recipe.com via Michelle on Pinterest


I have a wee problem, and that problem is that I bought too many chocolate chips. BJs had a giant bag of them, which I then purchased and set in the cupboard over the over-the-stove microwave. Pretty soon they were breaking down and starting to color. Yeah, turns out it gets hot there. So, in my panicked search for chocolate chip recipes, I came across this one.

 Verdict? Simple and delicious! A friend and I may or may not have eaten the whole pan in one sitting.


Ingredients:

  1. 1 package/1 cup frozen raspberries
  2. 3/4 semisweet (or bittersweet) chocolate chips
  3. 1/3 cup seedless strawberry (or raspberry) jam
  4. 2 tubes refrigerated crescent dough


 Process:
  1. Heat the oven to 375*F. Line a cookie sheet with aluminum foil and spray with cooking oil for good measure. 
  2. Open your crescent dough roll and place half of the triangles out on the sheet. Use the rest to turn these triangles into squares, pinching the joining sides together. We managed parallelograms, so ours turned into triangles instead of rectangles and didn't hold quite as much.
  3. Mix together chocolate chips, raspberries, and jam in a bowl. Spoon into your squares, covering only half of them. It's easy to put in too much.
  4. Fold your squares in half and press the sides together with a fork. Pierce each top for venting. We didn't bother with an egg wash, but if you're going to, this is the time to whisk a bit of egg and water together and brush it on top.
  5. Bake for 11 at 375*F or until the edges begin to brown.


Lesson: you cannot have too many chocolate chips!

Friday, May 3, 2013

Collards


Michelle, here!

Collard Greens are a(nother) first for me. I love garlic so when I saw the clear instructions for this easy recipe, I just had to try it. You can mix in similar greens like kale, as I did, or stick to collards.

All you need are:

  1. Collard Greens
  2. Whole Garlic
  3. Salt 
  4. A pot of boiling water 
  5. Strainer
  6. A saute pan
  7. Olive Oil
The original post has measurements, but I eyeballed every thing because I wasn't sure exactly how much greens I had and I love garlic more than most rational human beings.

The process:
  • First, prepare the greens by washing them and cutting out the stems. Removing the stems helps achieve an even consistency once they are cooked.
  • Second, salt the water in the pot and bring the pot to boiling. Dump in your greens for 5-10 minutes. Leaf vegetables are fairly delicate and you're about to cook them again, so it's difficult to under cook them. They also shrink down as they cook, so feel free to shove more in the pot than appears reasonable.
  • While they are boiling, slice your garlic thinly and heat up your olive oil in your saute pan. I used a whole bulb of garlic for about 3 bunches of greens. YUM.
  • Strain your greens.
    See? They already look cooked, but I want that garlic flavor in there!
  • Add the garlic to the hot saute pan, then a minute later, add the greens. Add a bit more salt if you like. Saute for a few more minutes, or until you can no longer resist the smell of garlic. :)
    OM NOM N-- Wait. The greens. Still need the greens.
-- NOM NOM!

This makes a great side and it is hard to mess up! Happy cooking. :)

Thursday, April 25, 2013

Roasted Peanuts


Michelle, here.

This week I held raw peanuts in my hand for the first time ever. It was less of a magical moment and more of a "OMG. Raw peanuts exist? Now what?" Thankfully, roasting peanuts is very easy. You don't even have to shuck them, if you prefer.

My husband said that, if you like your shelled roasted peanuts salted, you can soak them in salt water overnight. But, see, that requires that he tell me this the night before instead of when the peanuts are in the oven. Bah! Sounds like work.

Here is what I did:

1. Spread shelled peanuts on baking pans.


2. Set oven to 350*
3. Roast for 25 minutes.
4. Remove from oven and allow to cool.


Tada! Really, that's it.

Tips:

1. Do one pan at a time. I tried to do two pans and the pan closer to the heating element was overdone. Thus my burnt first attempt. Peanuts seem to quickly go from perfect to What Have You Done!
2. If you have a gas oven, like me, roast them for only 20 minutes.
3. If the peanuts are a tad overdone, remove them from the pan right away so that they will cool off faster.

Left to right: 1st, 2nd, and 3rd attempts. :)

Thursday, March 7, 2013

Crispy Sweet Potato Fries


I was very pleased with how these turned out! They weren't quite as crispy as in the original post, but the original poster also does a good job of setting your expectations. Basically, baked fries are hard and sweet potato fries are the hardest.

But I love sweet potatoes!

I also love the sirachi sauce recipe she has on the same page. WOW.

You'll need:

  • Sweet potatoes
  • A bowl of water
  • Corn starch
  • Olive Oil

The process:

1. Slice the sweet potatoes and slice the slices to get fry shapes. Mine were a little thick so aim for closer to a centimeter than 1/2 inch.

2. Soak them in water for at least an hour. Several hours is better.

3. Preheat oven to 425*F

4. Place the fries in a bag with about a tablespoon of cornstarch and shake, shake, shake! Too much cornstarch is a bad idea.

5. Place in a single layer on a lined cookie sheet. If they don't crisp up well you WILL regret leaving off the liner.

6. Drizzle with olive oil and toss them around in it.

7. Stick the fries in the oven and check after 15 minutes. If they're not too floppy or sticky, turn them. 30 minutes total should do it depending on the thickness of your fries.


And now, the amazing dipping sauce:

  • 1/2 cup of mayonaise 
  • 1 teaspoon of Sriracha sauce 
  • 1/4 teaspoon of Cayenne Pepper. 

Adjust to taste. OMG.

Thursday, February 28, 2013

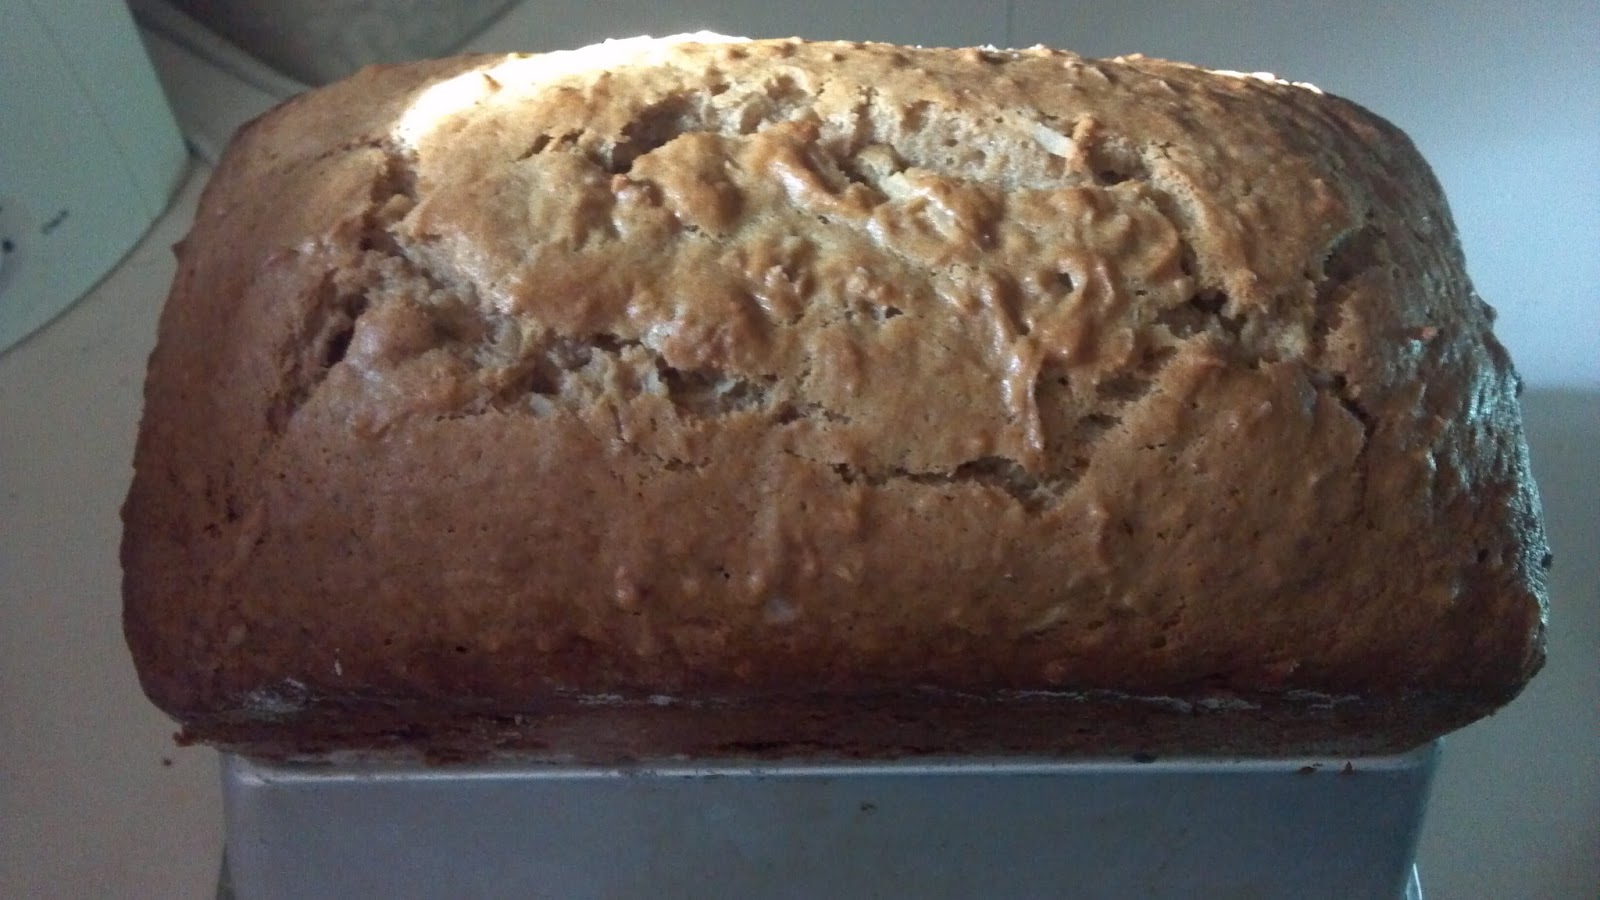
Banana Coconut Bread


Banana... coconut bread? Yes, it is as amazing as it sounds, even without the chopped nuts, which I leave out for allergy concerns. My Dad doesn't even like coconut and he liked this bread.


Ingredients:

What your bananas should look like.
  • 1 cup sugar
  • 1 stick of softened butter
  • 1/4 cup applesauce
  • 2 eggs
  • 2 large or 3 small very ripe bananas, smashed
  • 2 cups all-purpose flour
  • 1 tsp. cinnamon
  • 1 tsp. baking soda
  • 1 tsp. baking powder
  • 1 tsp. salt
  • ¾ cup shredded coconut


Directions:


1. Preheat the oven to 350 degrees F and grease and flour a 9X5 loaf pan. (1.5 quart capacity)

2. Using an electric mixer, cream the sugar and butter together until light and fluffy. Then add the applesauce, eggs and bananas. Mix until combined.

3. In a separate bowl, whisk together all the dried ingredients. Slowly beat the dry mixture into the wet.

4. Add the coconut. Mix well.

5. Pour the batter into the loaf pan. Bake for 20 minutes, then lower the temperature to 325 degrees F and bake another 40+ minutes, until a toothpick inserted in the middle comes out clean.


6. Allow the bread to cool for 10 minute in the pan, then flip it out onto a cooling rack.


Nom nom nom!